|
After talking with Malia Akutagawa the other day, she mentioned a video I should check out about some permaculture strides on Moloka'i with Geoff Lawton of PRI Australia. Checked it out and wanted to share. Mahalo Malia and Moloka'i gang for taking great strides forward. 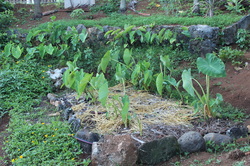 So we planted this mala in March and over the summer we had some interesting developments. Around May the kalo looked really good, about 3 feet high, good color and plenty keiki. In June I started to take some of the keiki to start them up in another area of the yard that is great for kalo starting. In about August to September I started to notice quite a few aphids on the under side of the leaves and on top as well. I also started seeing some leaves start to have brown spots and some leaves began to almost disintegrate entirely except for that veins of the lau, into almost a skelatol remains of a leaf, if you can imagine that. I started to take care of the aphid problem by shooting off most aphids when I had the chance and then mixing a solution of soft soapy water to spray on the leaves after I had shot off most aphids. I also spread a little diatomaceous earth near the base of each kalo to prevent ants from carrying more aphids up the plant. For the most part this worked and the aphids are not as prevelant. But I still had a lot of leaves turning brown and disintegrating. So I started to read about Kalo leaf blight and thought that could be a possibility or maybe some kind of fungus condition. I am attaching the pdfs from CTAHR about blight because I found it very handy. After reading I came to the understanding that it could possibly be lack of nutrients in the soil maybe calcium or magnesium or the watering style (mostly by waterhose or sprinkler) I was using, and the plants not being able to allow collected water to dry properly. I recently put in a drip hose and covered it with some mulch and straw, cut all the leaves that had those brown lesions and got rid of them and so far so good. I also plan to see if I can get some organic supplemental fertilizers and we will see how that goes. Has anyone out there had this kind of problem before? I will see how it goes and give everyone an update on how it goes. Sorry I didn't take any photos of the skeleton leaves or the lesions. I will if it happens again. But here is the pdfs from CTAHR. Mahalo.
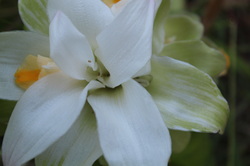 I thought I would blog a little on 'olena. This is a very awesome plant. I don't think my mana'o will do it justice, so, if you really want to learn more, there are choke la'au books in the library that talk about it, you could take la'au classes from Kamakakuokalani or Windward, or if you are lucky enough like me, you might talk with someone who has been growing and healing with this plant for years like Leina'ala. I love 'olena. I drink the tea (obtained from the root section) to help my body recover from a hard days work in the garden or for hard workouts. I love it so much that I also started cooking with it a lot, even bought some kind of organic powder version from whole foods while mine was growing. 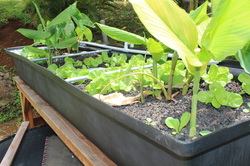 So besides my love for 'olena I wanted to share about it because I had committed about a third of my growbed to these plants for the last few months and just wanted to share the progress. They are doing well but at one point the leaves started to look pale with a light green complexion. So I went to my gurus for advice and they said I was probably lacking iron so they suggested Iron Chelate which I found at Waimanalo Aquaponics and easily added to my system by mixing a tablespoon with a 5 gallon bucket of water and added it to the fish tank. At this same time I added Oyster shells in a nylon sock because the ph of my water was dropping every week. Long story short, with these few adjustments, the 'olena and other mea in my growbed started to thrive again and now the pua 'olena is in bloom. From what I heard after the pua blooms, the plant will start to droop and look like its dying and that is when it is time to harvest. The plant is not technically dying but going into some kind of dormancy and will come back in its season. Though in some aquaponic systems, I have been told, the 'olena does not go dormant but stays upright all year long.  It took a while before we finally got our aquaponics system going. We had been thinking about it for a while and then began to do research on it which took even longer. These systems could provide us food in the limited amount of space we had to grow which meant it was definitely a technique which we wanted to test out in regards to small-space growing. Research included a lot of google searching, online and youtube.com video watching, some book and ctarh study deciphering, http://www.ctahr.hawaii.edu/site/, and many visits with friends how already had systems established. It was cool to kind of take the shot gun approach to research because it let our imaginations run wild, especially seeing some of the unique systems people share online. The possibility of growing our own food in such a small amount of space really intrigued us. We wanted to try it, we just needed to decide how we wanted to do it. These are some of the plants I started in my aquaponics; lettuce, kale, collard greens, kalo, carrots, olena. The cinders were finally seasoned enough to plant. 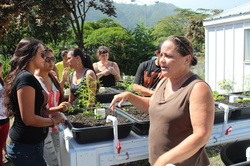 I need to send a special mahalo out to Leina'ala Bright and her kane David for all the help, advice and time they gave us to not only understand the concept, plan and imagine but also for the encouragement to continue and complete the establishment of our system. I visited them a lot, sometimes to talk story and ask questions, but most times to just stop and stare at their systems. I literally would just sit or stand there and look at the set ups, the plumbing, the fish, and just try to understand it all. I think this really helped in me visualizing our own system, because by the time I put ours together, everything was flowing pretty well. Mahalo again, Leina'ala and David. 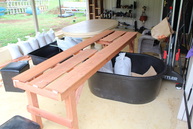 So I got motivation to start the system through the 699 class I set up to research small-space growing systems, got some funding (money!) through Hulili (mahalo!) to run my small research project, which covered about half of the Aquaponics systems costs. There were ways in which I was coached that could have saved me a few hundred dollars but in the end, for my first system, which I wanted to try and put together myself, I went with a pre-fab system from Waimanalo Aquaponics, which I only had to transport and put together, not engineer, and a table which I was going to build myself. The table wasn't too hard to build, I just followed some carpenter's advice that I got from David on how to build tables and from staring at his tables for a while. The only thing I would have done differently is moved the legs in more so that there isn't a long expanse between them, because the weight of the system has caused it to sag in the middle a bit. Not a lot, actually very little, but still kinda bugs me. The total amount of time for the table to gather materials, cut, and assemble was about 4-6 hours. Might have been cheaper if I totalled up my hourly worth and materials cost to buy the cinderblocks and pre-fab table from Waimanalo Aquaponics. But I appreciated the knowledge I gained from that experience. 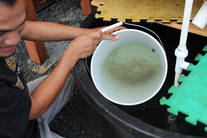 The next step in the process was getting the fish and running the systems long enough to build the organic matter in the growbed. I was told to run it for about a week before I started planting in it. I think I waited 5 days and then I started to plant. I was also told that if you take some cinder from an already established system, that the process can be done quicker. Mahalo to Leina'ala, Kai and Hale o Tuahine for the FNO free fish. They gave us about 50 baby talapia which made it safely to the fish tank. 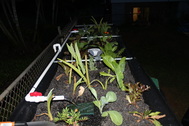 In this picture you can see the first plantings of this aquaponic system. I wanted to be diverse in my choices of mea kanu, so I planted kale, lettuce (romaine and red leaf), collard greens, kalo and olena. Mostly everything I put in here I sprouted myself and because of how long I took to get everything together (should have planned the sprouts a little better) they went in at about 6-8 inches tall. I think it would have been better to put them in between 1 and 3 inches. Well that about does it for setting up the system, getting the fish and planting the plants. Now I just gotta maintain and see how it goes. Look for future blogs to see how the system is doing and if it is something that would seem worth it for you. Here is a video we found very helpful in learning the no-dig gardening techniques we used featuring Myk Rushton, mahalo Myk.  It is always a good time when harvesting mea kanu. Especially when you can ho'okupu and share makana to others. Mahalo to my 'ohana for all the help and support and love. All these mea kanu came from the side of the house where we had a small mala kalo and some veggies in home-made bigger pond liner pots otherwise known as smart pots. The growing area is no more than about 3 feet by 10 feet. So me, my brother Maka, Jenny and the kids had a great time harvesting, cleaning, prepping some dishes and sending our friend home with some fresh greens. We mostly harvested kale, pele leaf and lu'au. We had enough to make some meat, lau and coconut milk dishes and some salad. Mahalo ke akua. 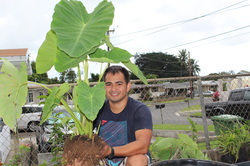 Aloha Everyone. I just wanted to take a brief moment to share my thoughts on Kalo. I feel that Kalo is so important not only as a food source but also as a source of identity, cultural re connection and healing. I had a blast trying to grow the baby kalo in a little 2x7 foot area and from these plants were able to produce enough keiki to give to Jerrick when he wanted to start his mala and some to take to my mom and dad's place and plant there. Everyone should try and grow some kalo, even if you have a small space. If you are thinking about it, start! The kalo will grow, the 'ohana will grow and your space will grow. Mahalo Haloa. 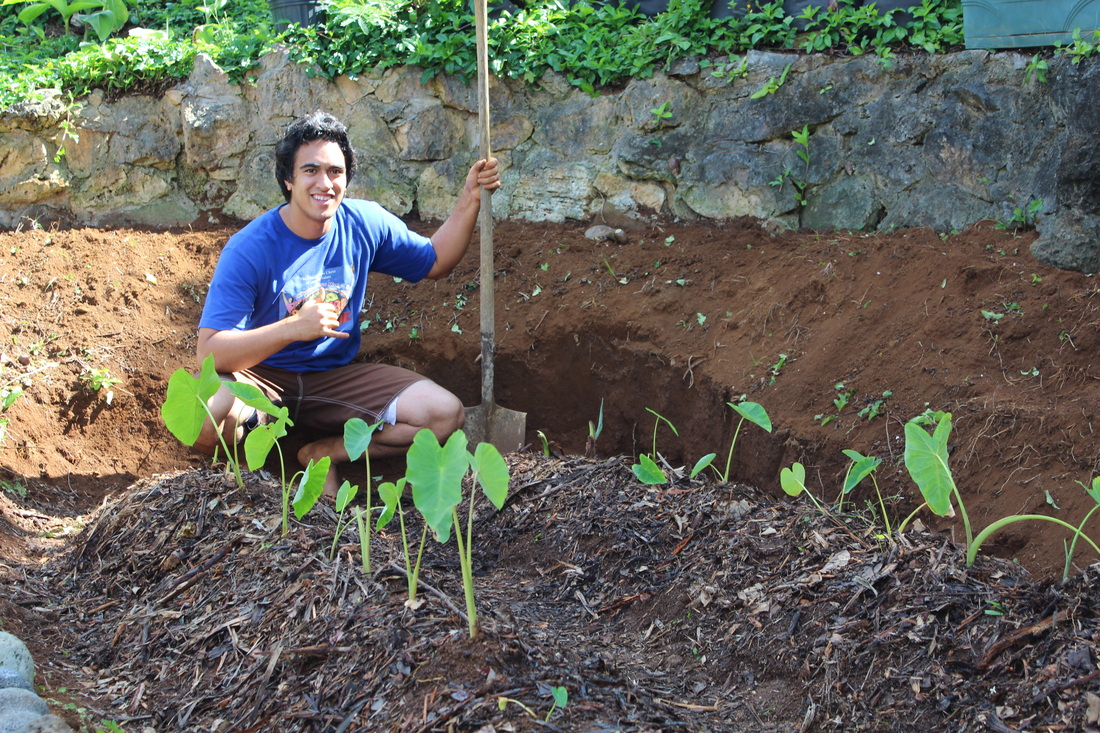
I thought I would just share the picture of the aquaponics system coming together. I want to share all the juicy nuggets with everyone on what I learned but that is going to take a little while to put up on the blog. Maybe after I finish the papers for school. Looking forward to sharing with everybody the whos, whats, wheres, whens and whys. Mahalo nui loa to Leina'ala Bright and David for all the help and support you gave me. You guys are the best.
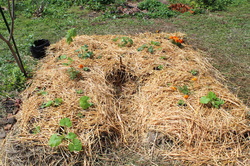 The last step in the no-dig gardening process is planting the vegetables. I stayed pretty conservative in what I put in the garden. Basically I put some won bok, kale, tomatoes, cucumbers, pumpkin and some collard greens. You simply need to move the straw that is on top to the side, did a small whole in the dirt layer and add the saplings straight from the starter pots. If there is a little root ball, then just break it up a little and then put it in the hole trying not to lose too much of the soil mixture, then cover the hole and pull the straw back. That was all there is too it, mahalo again to my brother Maka for helping me and we will ch
|
Mana's MalaRaymond Kaimana or "Mana" is documenting his journey as he researches and practices a hybrid of Hawaiian Planting techniques, Permaculture and other planting strategies. Archives
October 2013
Categories |
||||

|
|


 RSS Feed
